20160911

Build a better Hot Tub with Open Source Hardware!

The ancient mechanical control in my hot tub (Craigslist find under "You haul it away") officially died last year.  I got tired of running it manually after a timer bypass, and decided that there must be a better way.

I'm becoming less and less enthusiastic about "Internet of Things" products that are really just a thinly-disguised way to sell software-as-a-service.   This blog pretty much sums up my feelings on the matter.

If you've never designed an industrial control system before, this kind of project is an easy way to get started.

The first step was to decide what I wanted it to do.  The basic requirements were:


  • Maintain all hardware safety features in the existing system.  This included over-temp cut-off, a secondary over-temp by way of the existing mechanical thermostat, pressure-switch to enable the heater, GFI/earthing protection.
  • Include a high-accuracy real-time-clock (RTC) to trigger the outdoor lighting and maintance events.
  • Run a daily maintenance cycles to filter, chlorinate, and pre-heat the tub
  • Provide basic user controls for the jets, inside and outside lighting
  • Provide a a timeout feature if the jets are left on.
  • Allow for remote monitoring, logging and control at a later date.
  • Use hardware that is robust enough for 24/7/365 use outdoors, in an electrically-hostile environment.


Fortunately, I already had a head-start.  I have a small company that does open-source electronics, a business that started out of our hackersapce.  My Open Source RFID Access Control board, the AC400, is a pretty good industrial-grade microcontroller device that is hardened and ready to use for stuff like this.  You can get one of these at the Wall of Sheep Store.


When starting a project like this, I first take the details of what I want and make a "Pin Budget."  This is a spreadsheet that matches each project need to a specific pin of the microcontroller or board I am using, based on the capabilities.

Next, I take measurements and get the physical space constraints I need to fit the device into, including all externtal modules, switches, power supplies, etc.  Here is the start:


In this case, I cut out a piece of cardboard that fit inside the old control box.  I salvaged the pneumatic button switches from the old control and added a terminal strip from the junk box.  I chose a 40A Crydom solid-state relay specifically rated for AC motor control. Some excellent notes about sizing and choosing SSRs is available at Crydom's site.

In operation, SSRs get hot.  Since we would be space-constrained, I decided to go with a combination heatsink/mounting plate and use both sides for parts mounting.  For about $10, I had a 1/8" thick Aluminum plate sheared to a custom size at Unicorn Metals, one of my favorite new and used metal dealers in Southern California.

This place is an Aladdin's Cave of new and used materials including sheetmetal, pipe, motors, fans, circuit breakers, fasteners, and large items like giant industrial tanks and restaurant burners.

After coating it with Dykem layout fluid, I began scribing lines and drilling holes to mount everything.

Getting closer. I tapped all of the mounting holes to avoid having nuts on the backside, which makes servicing a nightmare.  The high-voltage items connect to the bottom strip, while the low-voltage connections happen on the small Euroterm strip at right.

In order to drill the mounting holes properly, I marked up the 1" spacers with a paint marker and stuck the unit in place.


The witness marks allowed me to drill the enclosure with an aircraft-length drill.  


And here it is with everything mounted:


The final article used a 10K thermistor mounted in the original location, the new control board and wiring in front,  the switches, SSR and a 12V, 5A DC power supply designed for outdoor lighting in back, and a dedicated ground bar tying all components together.

Here is the thermistor and the hacked control box being calibrated.  I used a random thermistor I had laying around, so I needed to expose it to a couple of known temperatures to calibrate it.  Here is a handy on-line tool for running the Steinhard-Hart equation.

I rewired this box for low-voltage operation and replaced the 110V Neon bulbs with LEDs that are controlled by high-power GPIO outputs from the board.

Note that the SSR and thermistor input need a small hardware change for best results:  The 2.2K input-protection resistors were swapped out for 0-ohm parts.  The ATMega 328P  is still protected with TVS diodes, so this isn't a big deal.


And the Chlorine dispenser. It's a Rotochem unit that dispenses approximately 20cc per minute of operation.  I'm using liquid Chlorine, and currently have it set to deliver 60ccs of Chlorine everyone morning at 0600, followed by 30 minutes of filtering.


And here it is under current test. Even though this SSR is rated to 40A, pump motors have a high startup current and the SSR must be derated to account for this.


The control program is event-driven.  The original pneumatic hot tub buttons activate momentary switches, which trigger an interrupt servicing routing (ISR).  One turns the jets/pump on and sets a 30-minute timeout variable.  The other button changes the state machine for the interior and exterior lighting.

Temperature is checked every 30 seconds.  This way, the gas heater isn't cycled excessively and it can allows the water in the pipe to equalize in temperature prior to the next check.  There is also a 50C thermal switch that interrupts power to the heater, in case the other safeties fail.  You can pick these up on Amazon for about $5, as they are a common appliance part.

There is also a "safety block" that runs on first bootup.  It checks all of the LEDs and determines if the thermistor is reading a sane value (i.e. is not shorted or open).  It will freeze the unit and go into an alarm condition with flashing LEDs if it detects this.

One issue: the thermistor is mounted in the equipment piping on my unit, which is exposed to the sun.  If no water has flowed in a few hours, it can get hot enough to trip the safety code or switch.  I recommend relocating the thermistor to a place that stays closer to the actual tub temperature if possible.

Interested in building one?  Here is the Github link to the source.

Arclight


20160824

Cyber Cassandra Complex

"While your faith in technology is endearing,
it will ultimately be your undoing"

Arclight has an old 2600 tshirt with a friendly robot on the back, uttering this stark phrase.  

When was the last time you looked around you at this technological society that has sprouted up around us, within our lifetimes?   If you're under 30 years old, you barely remember a time before the internet;  a strange far-off land where payphones and Thomas Guides helped us stay connected and get to where we were going. 

Remember when "Information Forever" wasn't reality?  Some time around 2008, roughly when humanity crossed the terabyte hard drive threshold, suddenly everything you've ever said and done online has been recorded, with metadata, for some kleptomaniacal reason that not even Edward Snowden understands. 

Never before have humans ever been required with wrangling and maintaining a digital personality.  Sure, you can go live under a rock somewhere without FaceSpace or Gmail, but the mere fact that you're reading this implies otherwise.  There are enormous philosophical and psychological components of this tool that we can barely comprehend, much less plan ahead for the inevitable technological singularity

During DEF CON earlier this year, DARPA sponsored an event that is edging us closer to true artifical intelligence than humanity has ever seen.  Luckily, SKYNET didn't wake up at that moment, humanity is safe for now. 

Do you think humanity is going to be satisfied until we get to that point?  Do you think we even have a choice in the matter? 

Remember not long ago when your cellphone was a single purpose device?  No malware, no Angry Birds, no Pokemon?   Now you're carrying around a general-purpose computer that not only makes phone calls, shows you around town, spies on you, is connected to billions of devices over the internet, with more computing power than supercomputers from a generation ago!  A question to ask yourself is, what do you think these devices will look like, and how will they behave in unintended ways a generation from now?

All it would take is a simple solar flare to ruin everything we hold dear.  What happens if the earth's magnetic poles decide to flip?  Imagine, if you can, if the Internet were to go down for some mysterious reason, and stay down, for a month.  How would people transact buisness?  How would people communicate with each other over vast distances?  We'd be instantaneously sent back to the 1950s.  Who knows how to make vacuum tubes anymore?

Self-driving cars will kill at least as many humans as human-driven cars, but with far less personal culpability and moral decision making ability than ever before. 


You go on ahead and catch those pokemon.  I think I'd rather stay right here with my books and tinfoil hat.

20160728

better CAD, better life, the same 3D prints

Have you always dreamed of having a more meaningful way to interact with your 3D printer, other than exclusively printing things you found on Thingiverse?  Have you ever needed to conjure a specific shape out of thin air?  The quickest way to up your 3D printing game is to learn a flavor or two of Computer Aided Design.

Freshly returned from the Mandelbrotian fractal shores of SIGGRAPH, my heart swells with 3D printing.  Although primarily a computer graphics conference, all the major players in Additive Manufacturing were out in force: Stratasys, 3D Systems, and Formlabs (Thanks for the coupon code).  Arguably, 3D printing isn't as much of a hot topic today as it was two or three years ago.

Why do you think that is?

Hypothesis: lack of hobbyist CAD users.

By now I'm sure you've heard my plastic Yoda head tirade.  TL;DR - When given technology reminiscent of Star Trek replicators, why is it that most users produce junk inferior to that from a Mold-A-Rama?


Worthwhile CAD tools have traditionally been equal parts unaffordable and challenging to learn.

There was a time, not long ago, when you had to be a degreed professional, backed by a corporate bank account, to access CAD tools.  Hell, it wasn't until the late 90's that desktop computers were fast, small,  and economical enough to run CAD applications, which still to this day can cost thousands of dollars.  One of the most widely-accepted CAD tool today, CATIA, isn't widely taught at the university level, despite having thousands of installations at major corporations like Boeing and GM.

Today is a totally different world.  Off the top of my head I can think of a handful of very powerful CAD tools that are available to use for free, or nearly free.  I grew up on Solidworks, so moving to Onshape was like moving from Coke to Diet Coke; the general flavor is similar, with less calories.  Recently, I've spent an awful lot of time in Autodesk Fusion360 lately, and I must say, the more I use it, the more I like it.  Where else can you find such powerful CAD/CAM tools that will take your shape and output code to your CNC machine?  The price is definitely right, too.

For the more masochistic types out there, there's always Freecad (huh?), Sketchup (no thanks), and OpenSCAD (nope nope nope).  Keep in mind that 3D software breeds cliques that put teenage girls to shame.  Alls I'm saying is that there are options nowadays.

On the left, you see the same basic design replicated in many different CAD environments.  From the top, you have: Solidworks, Autocad Inventor, Freecad, OpenSCAD,  Sketchup, and Catia. That's only naming a few of the choices out there.

They all will make the same part, the difference is in approach. Every single one of these softwares will output the fabled STL file, universally accepted by 3D printers everywhere*.

So far we've only covered CAD tools for engineering-type modeling.  We haven't begun to explore the world of Direct Editing.  Instead of designing parts in terms of dimensions and absolute shapes, Direct Editing, also known as Subdivision Modeling, is more like sculpting a statue out of clay.  I don't have any personal experience with any of those yet, I'll get back to you when I do.   To rattle off a few names: Maya, Zbrush, Blender, Rhino.....

Wise grandfather say - "The best time to plant a tree was twenty years ago.  The second-best time to plant a tree is now."   Whether you cut your teeth on Autocad '88 or have never touched CAD tools before, today's availability and accessibility of such tools is unprecedented.  It certainly won't be a burden to your life to have a smattering of CAD, I promise. 


Imagine what tomorrow can bring, considering that software development isn't going backwards any time soon.

20160519

Photogrammetry, or, 3D scan with a plain ol' camera


After a few years of plodding along the hackerspace / shadetree engineering path, I have encountered the same problem multiple times in multiple forms.  Once in a while, you need to translate an object which exists in the real world, into the digital world. 

Let's say you need a 3D model of the members of your band for a cool video.


In the old days, this was a tedious and manual process, to digitize anything, lacking any pre-existing tools that could easily facilitate the project.  Take Rebecca Allen, for example.  She worked for TWO YEARS to create the above 1986 Kraftwerk video.  Here she is pictured with a reference model of drummer Karl Bartos, plotting each point by hand with a digitizer, using homebrew software.  


Even if robust digitization tools existed 30 years ago, computer processing power at the time was generally unable to adequately handle the sheer volume of computation required for rendering even the simplest of 3D scenes. 

In 1982, it was even HARDER to digitize objects.  Remember Tron?


The Evans and Sutherland Picture System 2, which was used to render Tron, had a whopping 2 Megabytes of RAM, and 330 Mb of disk space.  A large percentage of the effects in this film were actually Rotoscoped by hand, rather than using a computer to add visual effects. 

Today, you can buy a Google Tango tablet, designed specifically for 3D imaging, with 4 Gb of RAM, a flamethrowing nVidia processor, all sorts of bells and whistles, for ~$500.  Put in relative terms, an iPad2 has equivalent GFLOP processing power of the most powerful Cray supercomputer from 30 years ago.  


You carry this around in your bag, like it's no big deal, and use it mostly for Flappy Bird. 

But I digress.

The point I'm trying to make, is that we are now carrying enough processing power around in our pockets to be able to accomplish sophisticated 3D imaging, which was previously computationally prohibitive. 

Beyond the absurd availability of computational power today, lots of research has been performed in the last 30 years in the field of computer simulation, ray tracing, and other relevant algorithms.  All this research adds together to allow this deluge of computer power to be specifically focused on the task at hand, in this case 3D imaging and reconstruction. 

In previous blog posts, we covered a low-cost scanning technique using the Microsoft Kinect sensor.  Initially not intended for use as a 3D scanner, massive development of the Kinect ecosystem by Microsoft and others has created a wake of alternative uses for the Kinect hardware.

One challenge with scanning using the Kinect is the trade-off between scan volume and resolution.  The Kinect is capable of scanning physical space ranging from 0.5 to 8 meters in size. Instead of pixels as you would have in a 2D environment, the Kinect tracks "voxels" in a 3D environment, in an array of roughly 600 x 600 x 600 elements.  In the highest quality settings, this makes for an minimum tolerance of +/- 1 mm of error, about 1% overall, in the resulting scan data.  This is great resolution when scanning items about the size of a shoe box, 0.5 m^3, but sometimes you want to scan larger objects that the Kinect would struggle to visualize with high enough resolution.

What about scanning objects smaller than 0.5 m^3?  The Kinect has a miminum scanning distance of ~600 mm, and has a difficult time visualizing small features on small parts. 

Using photogrammetry (specifically, stereophotogrammetry), all you need is an array of photographs from different angles of the same scene, and a properly configured software stack. 

There are a few photogrammetry solutions on the market ranging from free to very expensive.  Most of these softwares essentially do the same thing, the main distinction being that 123DCatch performs remote processing on the cloud, where CapturingReality performs the required calculations locally.  Due to this fact, your choice of software boils down to what quality of hardware you're using. 

My toolchain of choice for this process is twofold: VisualSFM and Meshlab.  Both of these tools are free, mostly open-source*, and quite robust once you know how to coax the proper filtered data out.  The main benefit of this toolchain is that they're freely available for Linux / Mac / Windows.  It can even be done without CUDA cores, although it seems that some optimization for the process is achieved with using CUDA architecture GPUs

VisualSFM is used to sort an array of images, and apply the SIFT algorithm for feature detection on each image.  This processes each image using the Difference of Gaussians, one method for computerized feature recognition, along with a comparison between each frame.  The software is then able to infer a relative position and orientation for each camera.


Meshlab is used to perform a mathematical reconstruction of the VisualSFM output.  VisualSFM outputs a cartesian point cloud, and it's your job as the creative human to make sense of that data (turns out 3 Dimensional matching has been proven to be NP-hard).  

A point cloud by itself isn't inherently useful.  With Meshlab, we perform a conversion of the noisy point cloud to a high quality, watertight triangular mesh which can then be used in all sorts of applications like reverse engineering, 3D printing, VR and AR, computer vision, et cetera.  


We first perform a Poisson surface reconstruction to create a solid, triangular-faceted surface with a high quality alignment to the original point cloud.  The resulting mesh can tend to be noisy, so a few filtering algorithms are applied to smooth the surfaces and edges and clean the outliers.  Essentially, all you're doing is noise filtering.
Mesh size is of crucial importance for computability.  Sometimes the meshes reconstruct with millions of faces, which can be challenging to process on anything but modern gaming rigs with giant GPUs.  Furthermore, our resulting reconstruction is rough, aesthetically approximating a surface, rather than being a 99% dimensionally accurate representation of the surface.  Such a high quality of reconstruction is approachable using strictly photogrammetric or structured light techniques, but probably better suited to Time-of-Flight laser scanning techniques like that of the NextEngine.  TOF scanners can achieve micron-scale resolution, unlike triangulation scanners like the Kinect.  

Do we need to reconstruct a scene in a video game, requiring a low quality model with a high quality, registered texture?  Do we need to recreate a shape with a high dimensional accuracy, with no consideration to texture or color?  Photogrammetry can accomplish both, but is better at the former.

Meshlab is used to robustly modify the reconstructed mesh surface with mathematical processes (you should probably also look at Meshmixer).  Some of the more challenging, opaque problems can hide deep within the mesh, like a single non-manifold vertex which may never appear in the visual rendering.  This can be solved with a quick selection filter, and deleting the offending geometry.  "Quadric Edge Collapse Decimation" is used to reduce the polygon count of the resulting surface.  My favorite filter lately has been "Parameterize and texturize from registered rasters" which creates an awesome texture map with VisualSFM output. 

Once you have the clean, reconstructed surface, save the file somewhere memorable.  VisualSFM has an output file called "bundle.rd.out" which is a sparse reconstruction of the surface, along with "list.txt" which is the list of registered raster images we're going to use to apply color to the reconstructed surface. By importing the reconstructed surface into this new workspace, we can superimpose the aligned raster images with the reconstructed mesh, then projecting the color with a little software magic. 


The resulting surface can be further refined by applying different shaders and lighting schemes. 


Granted, there is a small amount of visual distortion in the resulting reconstruction and texturizing of the mesh.   I'm sure with a few dozen more images of this scene, along with more processing time, that would result in a more accurate volumetric representation of the scene.  To achieve a higher quality texture map, a little more love needs to be used when parameterizing the raster images onto the mesh.  

One thing to remember is that photogrammatically reconstructed surfaces have no inherent relation to scale.  This can be corrected with a comparison to a known reference dimension.  We could probably look up on Amazon the dimensions of the "Pocket Kanji Guide", and appropriately scale the data.  In this instance, accuracy in scale isn't the main intent.  If inserted dimensionally accurate references into the photo, rescaling should be reasonably accurate.   Meshlab's default output unit is in millimeters. 

Compare the result of our quick, admittedly low-quality reconstruction (using a dozen VGA-resolution images), versus one with hundreds of reference photos and processed overnight using expensive (but very good) software.  These images are probably taken on something with better than VGA resolution. 


A few limitations -

Since we're using visible-light techniques, we have to deal with optical restrictions.  Reflections and shadowed surfaces are troublesome to reconstruct.  Diffuse, even lighting conditions are optimal for photogrammetric reconstruction, so try taking pictures outside on a cloudy day.  Lens choice is also important, with a 35-50 mm lens most closely approximating the human field of view with the least amount of distortion. 

Objects scanned with photogrammetry techniques should typically remain still while capturing data.  It's possible to assemble a camera rig with n cameras in various orientations around a common scene.  Multiple instantaneous views could then be processed using these techniques.

The SIFT algorithm works best when applied on images with lots of orientable visible features, like repeating vertical and horizontal lines and contrasting color; not so well with objects like a plain flower vase where all sides appear the same.  

The toolchain is painfully disjoint, requiring extensive domain knowledge and a mostly undocumented software stack to make sense of the subject.  We have yet to attempt importing the resulting mesh into engineering software like Solidworks, which would require conversion of file type using yet another piece of software.  We've used FreeCAD to convert the mesh to IGES format, but this can also be done with propietary software packages like GeoMagic.  The conversion can be non-trivial and lossy, akin to making vectors from rasters. 

A few benefits -

Apart from being a non-contact reconstruction method, photogrammetry lends itself well to scaling.  Very small or very large objects can be reconstructed with similar ease.  Your only limitation for mesh size is how much horsepower your workstation has.  Meshlab / VisualSFM can also be configured to run on AWS cloud, which has options for choosing GPU heavy machines. 

You can also grok crowdsourced images from Google, and use people's vacation photos of visiting the Coliseum in Rome, feeding the resulting data into VisualSFM with impressive results.  Screen captures from videos?  No problem.  In fact, you could walk by your scan target with your cameraphone recording a high definition video of the target, and reconstruct these things later.  Soon, this is a process that will happen on-the-fly.


Only recently has technology become affordable enough and accessible enough to whimsically perform these types of operations on a large data set like a complex, textured 3D object.   Although Moore's law is tapering off, processor power continues to get cheaper and smaller.  It's exciting to consider what will develop in the near future as people continue to discover more efficient algorithms, better sensors, and more creative applications.  

What kinds of interesting things can you think of to use this technology for? 


*VisualSFM, by Changchang Wu, is a closed source program developed from scratch.  SiftGPU is Open sourced.  The SIFT algorithm, by David Lowe, is patented in the US to the University of British Columbia.  Meshlab is released using the GPL license. 

20160207

Bobby the Biker, hacker of all the things, needs our help

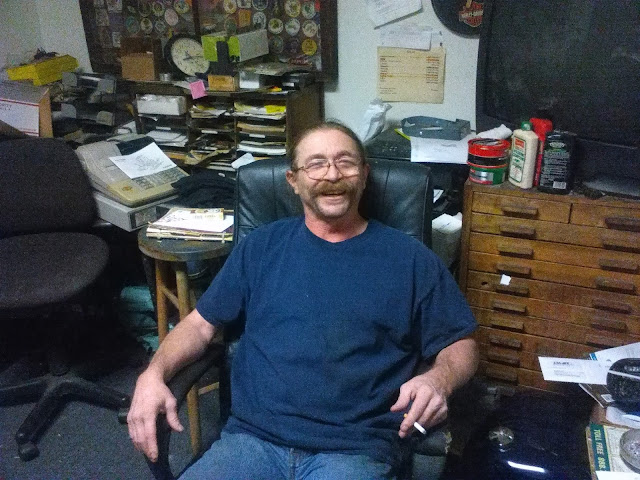
If you've ever been to an event at 23b Shop, you probably know Bobby, the loveable biker dude from a few doors down.


Hey you!  Here's a donate button! You can click on it, and you are going to want to do so, but please please read on to know why. You might not be able to donate money, but maybe you can help spread the word or lend a hand in another way. But ignore this button for now and read on...


Bobby has been to nearly every hacker potluck in the last four years, every single Sparklecon, and is always willing to lend a hand in causing some random mischief.  Ever crank handles on our old Bridgeport mill?  That came from Bobby's shop.

Bobby isn't a hacker in the sense that he's writing bash scripts (although he's using Linux Mint as a daily driver, with a microwave bridge hooked up to our NAS device).  Bobby is more of a life hacker. 

Bobby works on Harleys, a trade he learned from his Ex-Father-in-Law, Neal.  Neal has operated a Harley shop in Orange County since the 70s.  Neal is now in his 70s himself, and is falling apart slowly from Parkinsons and dementia.  Bobby has taken it upon himself to look after Neal over the past few years, at immense personal cost.  Bobby is Neal's full-time, unpaid care giver.  Bobby has a heart of gold, and is self-describes as being "patient as a rock".

Neal used to be a real bad dude, 6'4" of big mean biker gruff.  Now, Neal is 98lbs soaking wet, hunched over, barely able to speak, requiring 24-7 live in care to help manage things like catheters, gastric tubes, showers, going to the bathroom, back and forth transportation to the local VA hospital for numerous procedures and appointments, and all sorts of things like that.  Neal is also a stubborn old coot who would rather die on his terms in a motorcycle shop than rot away in a frog pond.  Bobby does his very best to indulge Neal's wishes.


Except now.

They have to be out by the end of the month.  The landlord denied a renewal of their lease on their Harley shop.


This would be an inconvenience to anyone, for sure.  Beyond the decades of accumulated stuff they have scattered about their shop, there's another complication.  Their shop is also their home. 

Bobby has a bit of a Catch-22 on his hands.  Neal would qualify for some more assistance through the VA if he had a residential address, but they live in a commercial space.  The business doesn't make enough money to support an external residence, and Bobby has been spending so much time caring for Neal that no real meaningful work can be done in the shop. 


Bobby is the resilient sort, he will be fine and land on his feet somehow.  It's how to take care of Neal that is the concern.  Neal would be homeless were it not for Bobby, but it's beginning to look like that hand is being forced.

Short of taking care of Neal myself which I am completely unqualified to do, I believe we can come together as a community to give Bobby a little monetary boost to help him in his time of need.  He has some good stuff in exchange as well. 

Neal's big old Hendey lathe is for sale. 


This lathe is a BIG boy, a very fine example of machinery worth preserving.

I'd like to get Bobby a good price for this lathe and move it over to 23b Shop.  That money would be enough to foot the bill for an apartment for a month or two, long enough for them to get on their feet and the wheels cranking for VA benefits that would apply to them now that they would have a residential address, or to find Neal more permanent skilled care and free Bobby so he can find work himself. 

But wait, there's more -

The lathe that is currently in heavy rotation at 23b Shop would be moved to Mag Lab as a hand-me-down, but still a quite excellent machine no less.   There's even a whole slew of tooling that will come along with both machines, so no one leaves empty handed.  I've already worked out the details with Trent and Arclight, this plan is a go once we put some much-needed cash in Bobby's hand. 

I started out at 23b Shop on the lathe.  All the success in my adult life I owe to the things I've learned at 23b, and I'd like to give back to you guys.  If anyone donates $100 or more, I'll make time to teach them a half-day, hands-on lathe class at their hackerspace of choice.  I also do 3D CAD, 3D printing, 3D scanning projects, services and lessons as well, all of which I'd be happy to exchange for donations toward this worthy cause.  Anything helps, cash is best since bikers don't really do Bitcoin, but we can certainly take a Paypal donation in their name.  Let's make this happen by this month's Hacker Potluck on February 20th.

Can't make a monetary donation, but are able to lend a hand?  We'll need a few strong backs toward the end of this month to help sort and process and package their inventory before it gets sent off to storage. 

Perhaps someone out there has some insight to social services that we aren't aware of that would make their challenges less painful?

By helping Bobby and Neal, we also can up our own game and hack better by putting more of Neal's good old machines back in the hands of hungry hardware hackers, where they will be loved and fostered as their original owner fades away into the inevitable, never-ending night.  
 

Hey! Remember me? Your friendly 23b Paypal donate button? From back at the beginning of this post? Well if you feel so inclined, please do click on it now.  All of us here at the 23b shop will greatly appreciate it if you are able to give.

Thank you.
 

20151202

Computer Aided Design for the modern world - meet Onshape

Muggles generally don't use CAD software because the good stuff is expensive, and the free stuff sucks.  No matter what, it's always a pain to learn to use, and rarely geared toward more casual use.  You get what you pay for, information doesn't want to be free.  

"THAT'S never happened to ME before"

Last March, after spending nearly every waking moment of the previous three months at my tech support job un-fuckleing people's D.I.Y. Solidworks installs, I ran across something on the 'net that exploded my head. 

Professional grade CAD on the cloud.  For free.  Onshape


I know what you're thinking, "There's no such thing as a free lunch!  There is no such thing as the cloud, it's just someone else's computer..."  But that's just it.  Virtualization is exactly what the CAD industry needs. 

You see, Solidworks, just like every other big piece of software, is a jealous stampy elephant. "That elephant cost me thousands of dollars!"  How right you are, Homer.  This is a great clip, you'll know of my my plight immediately.  "And now I'll get my hands out with my face." 


Professional CAD software is capable of doing a great amount of work commanded by a skilled mahout, but be very cautious during musth season.  For Solidworks, typically 90 minute long, 5 GB installs of byzantine configs and unknowable dependencies can make for a lot of headache during software upgrade season for those experienced with the process.  Now imagine what happens when every Barney Fife in the engineering department takes a stab at the same software update on their own?  *shudder*

The problem is, Solidworks essentially forces everyone to upgrade at the same time, since new files aren't very backwards compatible with old versions.  If your customer sends you a part file in 2016 format and you're still on 2014, you're faced with a nontrivial maintenance fee if you want to ever see your customer's files (thanks for changing the policy this year, D'assault!).  With Onshape, you're always on the latest greatest version, no matter what. 

We all have our own tech support horror stories, so I won't bore you with mine other than it saddens me to consider how much of my life has been spent watching status bars slowly creep across a screen. 

My biggest complaint has been the physical size of the hardware.  Yes, we've come a long way since the days of PDP-8, I should be grateful for the 15 lb monster of a workstation laptop I dragged around.  When nVidia mailed a Grid Server to my office a few years ago, I couldn't be more excited.  "Wow, now I can do my CAD on a thin client!".

I never got to use the damn thing, the project was canceled only a few months in.  It would have made one helluva bitcoin miner.

During my travels to San Francisco this past April, I made my pilgrimage to the infamous Noisebridge Hackerspace to teach a CNC machining class.  Their machine is pretty much what got me started down this crazy hacker journey a few years ago.

While visiting, I was showing off Onshape to one of the local denizens.  "Oh wow, it works on ChromeOS," he remarked.  I didn't notice at first the Chrome terminal I was using for Onshape.  That's when it all hit me.  "Why in the world am I carrying around this Death Star laptop when all I need is a connection to the internet?"

I totally understand that Computer Aided Design is number-intensive, requiring unobtanium graphics cards that are optimized for doublelong precision numbers so your designs remain accurate to half a wavelength of ultraviolet.  I don't  understand needing two hard drives in a laptop anymore, like my workstation came equipped with.  When you think about it, though, most of the machine is pretty much unnecessary at this point in history, if you've got enough AWS space to throw at it.

"But the cloud could go down", or, "I want all my data to be mine, private and nobody else's."  Yes, that's one small price to pay for this awesome "freemium" tool.  You're not Boeing, you don't need 100% uptime, iron-clad data control for your trinkets.  If you do, Onshape offers services just for that. 

"Back in my day, I had to scrimshaw custom ring tones in raw MIDI, and I was happy about it!"

 We simply don't live in those dark days anymore. 

After a few years as a professional Solidworks user, I find that Onshape meets most of my needs about 80% of the time with 80%  the package (subjetive, i know).  I also feel that at least 80% of the basic skillset between Solidworks and Onshape transpose, even some of the hot keys are the same (that's more objective).  Here's an interesting fact, the founder of Onshape, JON HIRSCHTICK, is also the founder of Solidworks, which he funded with his earnings from his time on the MIT blackjack team.

Don't get me wrong, Solidworks is a great program, there's a reason it's a de facto industry standard.  What I'm saying is that maybe you don't need the ultradeluxe simulation package if all you need to do is make some trinkets for your mom on your Makerbot.  The nice thing about using Onshape is that when you're ready for more, you can go straight to using Solidworks with a existing skillset.

Working in the machine shop, my job is to make shapes defined by their size and dimensions.  "I need a half inch thick gasket three inches around with four quarter inch bolt holes evenly spaced around the perimeter"

Here's your gasket, maybe you'd like to describe it more fully, there's some dangling dimensions
 
 That's why I think the 3d printer is so nifty, it trivializes what used to be a long arduous process to make a complex shape.  The 3d printer can easily produce shapes that traditional processes can't begin to touch. 


Powerful CAD is the only way to interact with 3D printers, unless you like scrimshawing megabytes of raw G code. 

If low level is your thing, there's always OpenSCAD.  See that script on the left side, that's how you program in OpenSCAD.  Not graphically, in raw code.  No thanks.  Nope.


While writing this blog, I grabbed a random complex model from GrabCad, in this case a 3D printer assembly, in a neutral file format, and imported the same file both into Solidworks and Onshape.  Onshape cleverly integrates a file management system, with many models already uploaded and available for everyone to integrate in their designs.  For this test, I used a file from another source, in a non-native format.

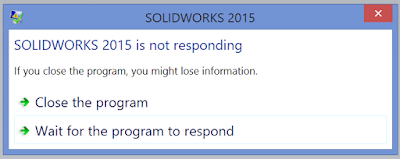
In a dramatic show of mettle, I raced the two side by side, and even let Solidworks have a head start on rendering the file while the same one uploaded (200+ MB) to Onshape.  This is the result. 


After 30 minutes of waiting, Solidworks still could not render the file.  I'll be honest and say I'm not using an Solidworks-approved graphics card, but isn't that type of problem what we're trying to move away from?   I'm pretty sure that Sketchup, TinkerCAD, etc., would also fall flat on their respective faces, assuming they can handle STEP files at all. 

When Solidworks crashes, it can be catastrophic.  Your data is lost, your setting are buggered, hours of work vaporized.  At the very least, you probably have to restart the program, or reboot your computer.

With Onshape, if EVERYTHING goes wrong, all you do is reload the browser window.  After about 40 hours of solid use, I have yet to run Onshape so hard into a wall that it seemed unstable in any way.  I'm sure if I tried hard enough, I could DDOS myself by dividing by zero in a variable somewhere, but truthfully it's an amazingly robust program.  When you make an error that would cause Solidworks to puke buffer overflow all over itself, Onshape politely stutters, and simply refuses to render the last command (consistent architecture on the cloud is a bit more predictable?).

These are using the same data, Onshape on the left, Solidworks on the right.

Your 3D printer is useful for so much more than printing Yoda heads you downloaded from Thingiverse.   Combine the printer with some baseline 3D CAD skills, and suddenly your lowly Bukobot is a much more capable machine.  If you have a little bit of motivation to learn modern, powerful CAD like Onshape, then your only limitation is your imagination and patience.  Plus, you get a neat transposing skill set, having basic Solidworks skills without the Solidworks price tag.

evolution of a combat robot

As with any piece of software, there's still a bit of a learning curve involved.  Luckily, there's THOUSANDS of Solidworks users sprinkled throughout the world who can give cursory advice, lots of resources available online to learn the software, and we're starting to see Onshape classes being offered at hackerspaces around Southern California.  It's mostly a matter of getting out there and using it. Everyone has stuff they want to 3D print, this is one more excuse to make the cool things you've always dreamed of. 

Have you ever struggled with needing a part of a specific size and shape, that doesn't exist anywhere in the world?  Using your 3D printer, along with Onshape, can easily solve those problems which has haunted many nearly-finished projects that only needed a simple PCB standoff with offset holes.  Onshape isn't perfect, nothing is (what IS perfect?), but it's a great way to get your feet wet with industrial-grade 3D modeling software without getting hosed.


20150830

n00b hacks harder

This is Tim:


Tim's only somewhat a n00b.  Tim is an electronics expert, and music hacker; so much so, he created a synthesizer for the Nintendo DS.  Sometimes he just needs a little help with the hardware. 


Tim sometimes needs help with his hardware hacking game, to build electronics enclosures and stage accessories for his performances.  Tim frequently visits 23b Shop, Mag Labs, and Null Space Labs to do just that.  Clearly a hackerspace connoisseur.


Tim uses his product to perform live chiptune compositions, you may remember one such performance from Sparklecon.

https://vimeo.com/85220180


Here's a sample of some of Tim's trial-by-fire exploits. 


Tim has even gone through the trouble to learn Solidworks to up his game. The process was non-trivial and sometimes painful, but it paid off with awesome looking results.


Recently, Tim asked for advice on how to hack is new things.  "Maybe I can use the CNC mill to make the holes in this enclosure?"  


The Bridge Troll scoffed, "You've only got a dozen holes!  Carefully measure and lay out the panel, and drill away at home!  You don't need us to do this child's job!"

 CNC milling can be a challenging option, and certainly not one for the inexperienced.  CNC is a great option when you're making many copies of the same thing, or if something needs to be quite precise.  This is a box with some holes for big knobs, it probably doesn't need to be engineered to aircraft-grade standards.  "Go drill that on your drill press, and stop bothering me," I think to myself. 

Turns out, the Dunning-Kruger effect also works in reverse.  "Their research also suggests that conversely, highly skilled individuals may underestimate their relative competence, erroneously assuming that tasks that are easy for them also are easy for others."

Oops.


 "I started off taping the design to the box so that all of the holes would be properly lined up. Then I used a punch to make sure every hole had a proper center point."  Too bad we didn't think to mention a center point doesn't do much good without a subsequent center drill (before the real drill)

"Some of the holes could be made on the drill press, but because of the side of the part and the bends in it, some of them had to be done "freehand". That's what really gets me into trouble!"  NO, DON'T DO IT, TIM!!!

"Even stuff I drilled with the drill press was not immune to wandering, somehow."

 
As I begin to sarcastically joke, "I remember MY first time drilling thin aluminum," it dawns on me that it wasn't so long ago that it was in fact my first time drilling holes in thin aluminum, and they looked every bit as gnawed and chewed by robotic zombie rodents. 

Unfortunately, the diagnosis for recovery on this part was not good.  It's much more difficult to put metal back on than it is to take off, and the top half of this enclosure seemed beyond salvation. 

Undeterred by so much tilting at windmills, Tim came back to the shop last night with a flat, laser-cut panel of acrylic, determined to replace the now-scrapped curved top by bending a new one. 

"Roh'kay Raggy" my inner Scooby-Doo taunts from just beneath my conscious level.   Let me guide you, Tim. 

We improvised a bending jig by comparing the scrapped top panel to some pieces of wood and bar stock we had laying around the shop.


Getting ready to bend, I ask Tim, "Do you have any pieces to practice on?"

"No..."

"Allow me to get you something to practice on first, before we scrap the one good part you have."  Good lesson to learn right here, if you're going to make one single piece, you might as well make three, because you're going to scrap two in the process.


Turns out propane was a little too aggressive


Aaah, much better with the Harbor Freight heat gun. 

Bend one went well.


Another one of those voices bubbled up from my subconscious once again. 

"Did you consider a bend allowance?"

"What's a bend allowance?"

*Sigh*


When you make a bend in material, a portion of the material on the outer edge of the bend is stretched around the bend, while the material on the inner edge is compressed. 

When this happens, the material deforms, stretches, and shrinks in predictable ways, based on the magical "K factor" of the material.  Copypasta for clarity -

"K-factor is a ratio of location of the neutral line to the material thickness as defined by t/T where t = location of the neutral line and T = material thickness. The K-Factor formulation does not take the forming stresses into account but is simply a geometric calculation of the location of the neutral line after the forces are applied and is thus the roll-up of all the unknown (error) factors for a given setup. The K-factor depends on many factors including the material, the type of bending operation (coining, bottoming, air-bending, etc.) the tools, etc. and is typically between 0.3 to 0.5."


Fortunately for Tim, without knowing the K factor (or needing to know, for that matter), his bends were PERFECT. 

Unfortunately for Tim, he didn't account for the bend allowance, making his part a little bit short across the top.  He made the executive decision to cut a slit down the top of the part, and will patch it later with another flat piece of acrylic bonded to the top.  "It's not a bug, it's a feature!"

Nice save, and a VAST improvement from his first attempt a week or so ago. 


Well done, Tim.