
I'm becoming less and less enthusiastic about "Internet of Things" products that are really just a thinly-disguised way to sell software-as-a-service. This blog pretty much sums up my feelings on the matter.
If you've never designed an industrial control system before, this kind of project is an easy way to get started.
The first step was to decide what I wanted it to do. The basic requirements were:
- Maintain all hardware safety features in the existing system. This included over-temp cut-off, a secondary over-temp by way of the existing mechanical thermostat, pressure-switch to enable the heater, GFI/earthing protection.
- Include a high-accuracy real-time-clock (RTC) to trigger the outdoor lighting and maintance events.
- Run a daily maintenance cycles to filter, chlorinate, and pre-heat the tub
- Provide basic user controls for the jets, inside and outside lighting
- Provide a a timeout feature if the jets are left on.
- Allow for remote monitoring, logging and control at a later date.
- Use hardware that is robust enough for 24/7/365 use outdoors, in an electrically-hostile environment.
Fortunately, I already had a head-start. I have a small company that does open-source electronics, a business that started out of our hackersapce. My Open Source RFID Access Control board, the AC400, is a pretty good industrial-grade microcontroller device that is hardened and ready to use for stuff like this. You can get one of these at the Wall of Sheep Store.

When starting a project like this, I first take the details of what I want and make a "Pin Budget." This is a spreadsheet that matches each project need to a specific pin of the microcontroller or board I am using, based on the capabilities.
Next, I take measurements and get the physical space constraints I need to fit the device into, including all externtal modules, switches, power supplies, etc. Here is the start:

In this case, I cut out a piece of cardboard that fit inside the old control box. I salvaged the pneumatic button switches from the old control and added a terminal strip from the junk box. I chose a 40A Crydom solid-state relay specifically rated for AC motor control. Some excellent notes about sizing and choosing SSRs is available at Crydom's site.
In operation, SSRs get hot. Since we would be space-constrained, I decided to go with a combination heatsink/mounting plate and use both sides for parts mounting. For about $10, I had a 1/8" thick Aluminum plate sheared to a custom size at Unicorn Metals, one of my favorite new and used metal dealers in Southern California.
This place is an Aladdin's Cave of new and used materials including sheetmetal, pipe, motors, fans, circuit breakers, fasteners, and large items like giant industrial tanks and restaurant burners.
After coating it with Dykem layout fluid, I began scribing lines and drilling holes to mount everything.

Getting closer. I tapped all of the mounting holes to avoid having nuts on the backside, which makes servicing a nightmare. The high-voltage items connect to the bottom strip, while the low-voltage connections happen on the small Euroterm strip at right.


The witness marks allowed me to drill the enclosure with an aircraft-length drill.

And here it is with everything mounted:

The final article used a 10K thermistor mounted in the original location, the new control board and wiring in front, the switches, SSR and a 12V, 5A DC power supply designed for outdoor lighting in back, and a dedicated ground bar tying all components together.
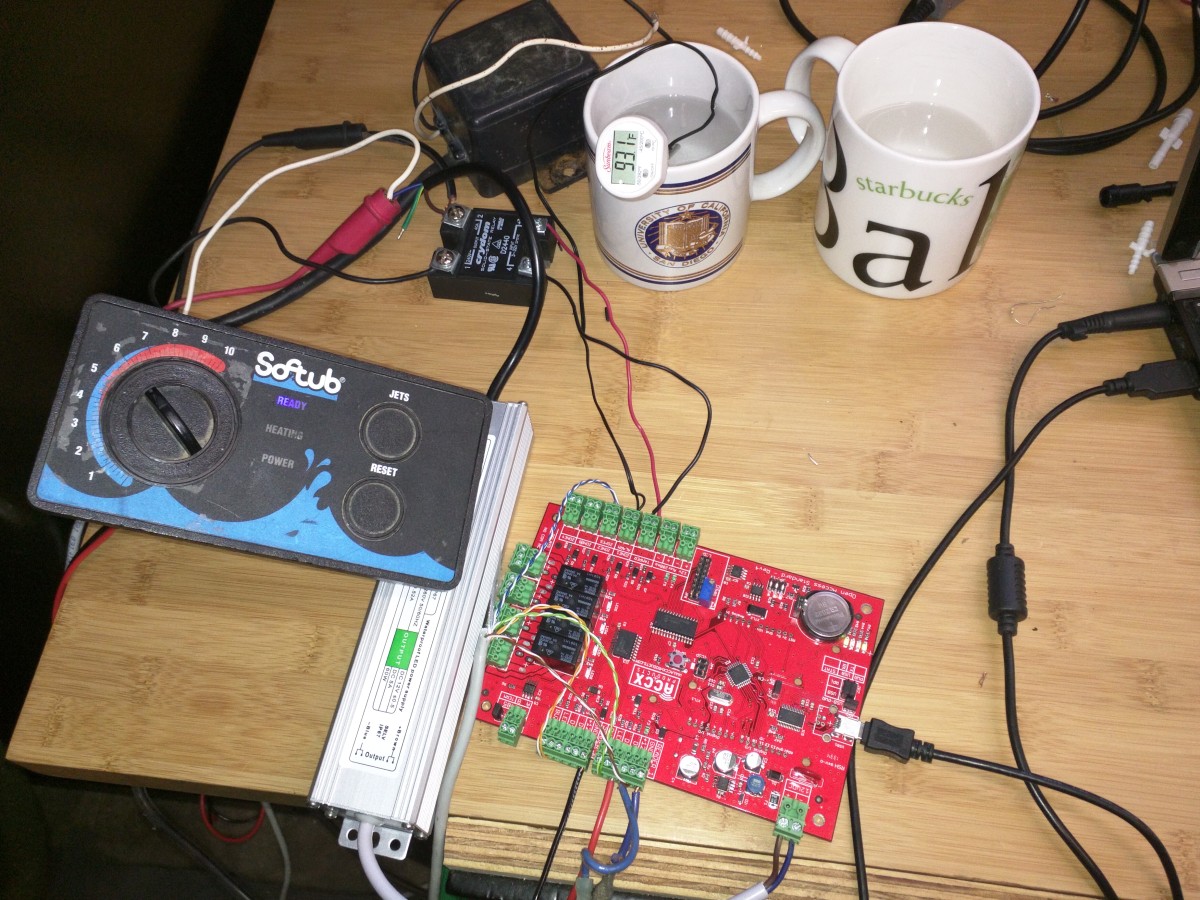
Here is the thermistor and the hacked control box being calibrated. I used a random thermistor I had laying around, so I needed to expose it to a couple of known temperatures to calibrate it. Here is a handy on-line tool for running the Steinhard-Hart equation.
I rewired this box for low-voltage operation and replaced the 110V Neon bulbs with LEDs that are controlled by high-power GPIO outputs from the board.
Note that the SSR and thermistor input need a small hardware change for best results: The 2.2K input-protection resistors were swapped out for 0-ohm parts. The ATMega 328P is still protected with TVS diodes, so this isn't a big deal.
And the Chlorine dispenser. It's a Rotochem unit that dispenses approximately 20cc per minute of operation. I'm using liquid Chlorine, and currently have it set to deliver 60ccs of Chlorine everyone morning at 0600, followed by 30 minutes of filtering.

And here it is under current test. Even though this SSR is rated to 40A, pump motors have a high startup current and the SSR must be derated to account for this.

The control program is event-driven. The original pneumatic hot tub buttons activate momentary switches, which trigger an interrupt servicing routing (ISR). One turns the jets/pump on and sets a 30-minute timeout variable. The other button changes the state machine for the interior and exterior lighting.
Temperature is checked every 30 seconds. This way, the gas heater isn't cycled excessively and it can allows the water in the pipe to equalize in temperature prior to the next check. There is also a 50C thermal switch that interrupts power to the heater, in case the other safeties fail. You can pick these up on Amazon for about $5, as they are a common appliance part.
There is also a "safety block" that runs on first bootup. It checks all of the LEDs and determines if the thermistor is reading a sane value (i.e. is not shorted or open). It will freeze the unit and go into an alarm condition with flashing LEDs if it detects this.
One issue: the thermistor is mounted in the equipment piping on my unit, which is exposed to the sun. If no water has flowed in a few hours, it can get hot enough to trip the safety code or switch. I recommend relocating the thermistor to a place that stays closer to the actual tub temperature if possible.
Interested in building one? Here is the Github link to the source.
Arclight